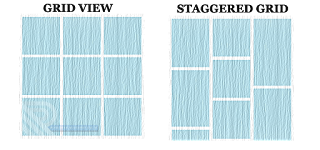
Tutorial Membuat Staggered Grid dengan RecyclerView | Android Studio
Tutorial Android Studio |
| Staggered Grid |
 |
| Staggered Grid |
Jika kalian ingin mencoba membuat Staggered Grid ini, berikut saya berikan Video Tutorialnya :
Jangan lupa klik SUBSCRIBE ya. Oke langsung saja tanpa basa-basi lagi kita langsung ke langkah pertama :
1. Buat project baru di Android Studio dengan cara klik File ⇒ Project Baru. Ketika diminta untuk memilih Default Activity, pilih Empty Activity dan klik next. Untuk minSDK, disini saya set API 21 ya.
2. Buka AndroidManifest.xml dan ubah menjadi seperti ini :
<?xml version="1.0" encoding="utf-8"?>
<manifest xmlns:android="http://schemas.android.com/apk/res/android"
    package="com.azhar.staggeredrecyclerview">

    <application
        android:allowBackup="true"
        android:icon="@mipmap/ic_launcher"
        android:label="@string/app_name"
        android:roundIcon="@mipmap/ic_launcher_round"
        android:supportsRtl="true"
        android:largeHeap="true"
        android:theme="@style/AppTheme">
        <activity android:name=".MainActivity">
            <intent-filter>
                <action android:name="android.intent.action.MAIN" />

                <category android:name="android.intent.category.LAUNCHER" />
            </intent-filter>
        </activity>
    </application>

</manifest>
3. Ubah isi MainActivity.java dan activity_main.xml menjadi seperti ini :
package com.azhar.staggeredrecyclerview;

import android.annotation.SuppressLint;
import android.graphics.Bitmap;
import android.graphics.BitmapFactory;
import android.os.Bundle;
import android.support.annotation.NonNull;
import android.support.v7.app.AppCompatActivity;
import android.support.v7.widget.RecyclerView;
import android.support.v7.widget.StaggeredGridLayoutManager;
import android.view.LayoutInflater;
import android.view.View;
import android.view.ViewGroup;
import android.widget.ImageView;
import android.widget.TextView;

/**
 * Created by Azhar Rivaldi on 27/03/2018.
 */

public class MainActivity extends AppCompatActivity {

    RecyclerView recyclerView;

    @Override
    protected void onCreate(Bundle savedInstanceState) {
        super.onCreate(savedInstanceState);
        setContentView(R.layout.activity_main);
        recyclerView = (RecyclerView) findViewById(R.id.recyclerView);
        Bitmap[] bitmaps = getBitmaps();
        MyRecyclerAdapter myRecyclerAdapter = new MyRecyclerAdapter(bitmaps);
        recyclerView.setLayoutManager(new StaggeredGridLayoutManager(2, StaggeredGridLayoutManager.VERTICAL));
        recyclerView.setAdapter(myRecyclerAdapter);

    }

    private Bitmap[] getBitmaps() {
        Bitmap[] tempBitmaps = new Bitmap[10];
        tempBitmaps[0] = BitmapFactory.decodeResource(getResources(), R.drawable.satu);
        tempBitmaps[1] = BitmapFactory.decodeResource(getResources(), R.drawable.lima);
        tempBitmaps[2] = BitmapFactory.decodeResource(getResources(), R.drawable.tiga);
        tempBitmaps[3] = BitmapFactory.decodeResource(getResources(), R.drawable.empat);
        tempBitmaps[4] = BitmapFactory.decodeResource(getResources(), R.drawable.dua);
        tempBitmaps[5] = BitmapFactory.decodeResource(getResources(), R.drawable.enam);
        tempBitmaps[6] = BitmapFactory.decodeResource(getResources(), R.drawable.tujuh);
        tempBitmaps[7] = BitmapFactory.decodeResource(getResources(), R.drawable.delapan);
        tempBitmaps[8] = BitmapFactory.decodeResource(getResources(), R.drawable.sembilan);
        tempBitmaps[9] = BitmapFactory.decodeResource(getResources(), R.drawable.sepuluh);
        return tempBitmaps;
    }

    private class MyRecyclerAdapter extends RecyclerView.Adapter {

        Bitmap[] bitmaps;

        public MyRecyclerAdapter(Bitmap[] bitmaps) {
            this.bitmaps = bitmaps;
        }

        @NonNull
        @Override
        public GridHolder onCreateViewHolder(@NonNull ViewGroup parent, int viewType) {
            View view = LayoutInflater.from(MainActivity.this).inflate(R.layout.staggered_grid, parent, false);
            return new GridHolder(view);
        }

        @SuppressLint("SetTextI18n")
        @Override
        public void onBindViewHolder(@NonNull GridHolder holder, int position) {
            holder.imageView.setImageBitmap(bitmaps[position]);
            holder.textView.setText("Deskripsi " + position);
        }

        @Override
        public int getItemCount() {
            return bitmaps.length;
        }
    }

    private class GridHolder extends RecyclerView.ViewHolder {

        ImageView imageView;
        TextView textView;

        public GridHolder(View itemView) {
            super(itemView);
            imageView = itemView.findViewById(R.id.imageView);
            textView = itemView.findViewById(R.id.desc);
        }
    }

}
;
<?xml version="1.0" encoding="utf-8"?>
<LinearLayout
    xmlns:android="http://schemas.android.com/apk/res/android"
    xmlns:tools="http://schemas.android.com/tools"
    android:layout_width="match_parent"
    android:layout_height="match_parent"
    tools:context=".MainActivity">

    <android.support.v7.widget.RecyclerView
        android:layout_width="match_parent"
        android:layout_height="match_parent"
        android:id="@+id/recyclerView"/>

</LinearLayout>
4. Langkah yang terakhir buat layout staggered_grid.xml dan isinya seperti ini :
<?xml version="1.0" encoding="utf-8"?>
<android.support.v7.widget.CardView
    xmlns:android="http://schemas.android.com/apk/res/android"
    android:layout_width="match_parent"
    android:layout_height="wrap_content"
    xmlns:app="http://schemas.android.com/apk/res-auto"
    android:layout_margin="16dp"
    app:cardCornerRadius="16dp">

    <LinearLayout
        android:layout_width="match_parent"
        android:layout_height="wrap_content"
        android:gravity="center"
        android:orientation="vertical">

        <ImageView
            android:layout_width="match_parent"
            android:layout_height="wrap_content"
            android:src="@mipmap/ic_launcher"
            android:scaleType="fitXY"
            android:id="@+id/imageView"/>

        <TextView
            android:layout_width="wrap_content"
            android:layout_height="wrap_content"
            android:layout_margin="8dp"
            android:text="Deskripsi"
            android:id="@+id/desc"/>

    </LinearLayout>

</android.support.v7.widget.CardView>
Jika semuanya sudah selesai bisa kalian RUN. Untuk file yang kurang seperti gambar yang ada di folder drawable, silahkan download di Github saya DISINI.
Kalau kalian mengikuti langkah-langkah diatas dengan baik, pasti aplikasi yang kalian buat akan berjalan sebagaimana mestinya. Namun jika mengalami Error, silahkan berikan komentar dan kita diskusikan bersama.
Demikian informasi yang saya bagikan untuk kalian. Jangan lupa bagikan artikel ini ke teman-teman kalian agar ikut membaca Tutorial Membuat Staggered Grid dengan RecyclerView | Android Studio ini. Subscribe juga di blog Rivaldi 48 ini agar kalian mendapatkan notifikasi saat Admin update artikel terbaru. Follow Instagram Admin @azhardvls_. Semoga kalian lebih nyaman dan mudah dalam mengakses Blog Rivaldi 48 dimanapun kalian berada. Terima Kasih...


Silahkan tinggalkan komentar jika Anda punya saran, kritik, atau pertanyaan seputar topik pembahasan. Gunakan bahasa yang bijak dan santun. Terima Kasih.